
BASICS & FAVORITES OF EMBROIDERY TOOLS
Providing the right embroidery tools for every job can make all the difference. As with any hobby, embroidery tools range from the basic to the specialized. Both beginners and experienced embroiderers need reliable tools to accomplish a variety of embroidery tasks. The embroidery enthusiast will find there are a few essential tools and then add-ons to those basics as you learn and experience.
BASICS OF EMBROIDERY TOOLS
You will need 5 basic embroidery tools to start. In the next section, I outline all the extras you will gradually need to accumulate. Many of the tools in the second section you may already have.
NEEDLES - THE FIRST EMBROIDERY TOOL
In order to sew, needles are very important. There are three basic needles used for embroidery tools and they come in various sizes. The three basic needles include crewel, tapestry, and milliner needles.
A crewel needle has a short sharp tip, a medium to long eye, and a slightly larger eye than the shaft. It is available in a range of sizes from 1 – 12 with 1 being the largest size and 12 being the smallest size. In order to suit different projects, buy a packet of assorted sizes.
There are sizes 13 - 28 tapestry needles, with 13 being the smallest. Tapestry needles have a shorter shaft and a longer eye. They have a blunt or rounded tip, which enables them to pass through the fabric without catching.
Milliner needles are also known as straw needles because they have short sharp eyes that are useful for stitches that are wrapped, such as French knots. Because the eye and shaft are the same size, the milliner needle can be used to stitch wrap-arounds such as bullion and French knots.
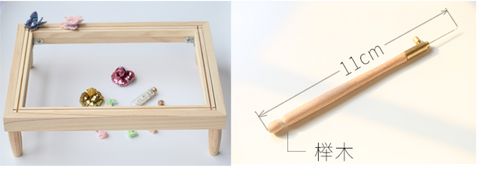
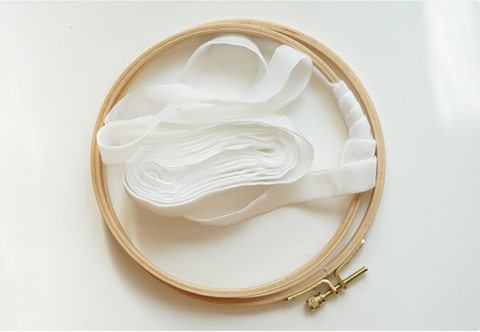
HOOPS - EMBROIDERY TOOL #2
Embroidery hoops and frames are next on the list of essential tools. Designed to keep the fabric taut and the stitches taut while the embroidery is being stitched, they are made of wood, bamboo, or plastic. The machine embroidery hoops can be square, whereas the hand embroidery hoops are round or oval.
A beginner can use plastic and wood hoops, while a more experienced seamstress can use brass hoops. The wood versions I have don't hold the fabric as tightly as the plastic ones do. If you purchase plastic, get a good quality hard plastic.
It is a good idea to buy a few sizes for different projects, and keep in mind that you can always move the smaller hoops around for larger items. I have a few larger hoops that I never use, as I prefer to work with the smaller hoops.
SCISSORS - EMBROIDERY TOOL #3
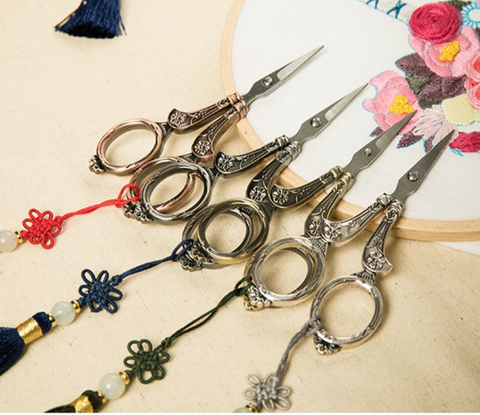
In addition to a small sharp pair of scissors, embroidery scissors are smaller and more pointed. They have smaller sharper blades that enable them to cut close to the thread.
If you've watched any of my Youtube videos, you'll recognize the gold stork pair below. Many of them have storks and designs, but a plain pair will also work.
LIGHTING - EMBROIDERY TOOLS #4
Embroidery requires good lighting. It can be a really good spot by the window or a proper lamp. Magnifying lamps are a great asset for really fine work.
Pinning
Create a printout
Providing the right embroidery tools for every job can make all the difference in the world. Both beginners and experienced embroiderers need reliable tools for a variety of embroidery projects. There are some essential tools for embroidery enthusiasts, and as they learn and gain experience, you will be able to add to those basics. Like any hobby, embroidery tools range from the basic to the specialized.
Tools for embroidery
Tools for embroidery
BASICS of Embroidery Tools
Needles - Embroidery Tools #1
Hoops - Embroidery Tools #2
Scissors - Embroidery Tool #3
Lighting - Embroidery Tools #4
Thread - Embroidery Tools #5
Fabric Embroidery Tools #6
Extras for Embroidery Tools
Organization - Embroidery Tools #7
Measuring Tools #8 - Embroidery Tools
Needle Threader - Embroidery Tools #9
Thimble - Embroidery Tool #10
Tracing Embroidery Tools #11
Pens - Embroidery Tools #12
Pins - Embroidery Tools #13
Seam Ripper - Embroidery Tool #14
Tweezers - Embroidery Tools #15
Pinking shears - Embroidery Tools #16
Beeswax Embroidery Tool #17
Iron - Embroidery Tools #18
Interfacing - Embroidery Tools #19
Conclusion - Embroidery Tools
THREAD - EMBROIDERY TOOL #5
When it comes to embroidery thread, you have many choices. Choose the type that best suits your project and the fabric. You can choose from floss, cotton, wool, and metallics. Make sure the thread is durable and washable.
Only use cheaper craft threads on projects that will not need to be washed. Also, some cheaper threads tend to tangle and knot more easily. I usually use a mixture of cheaper and more expensive embroidery floss in order to keep costs down. Most of my embroidery doesn't require washing. DMC is known for good quality embroidery floss.
If you want to do 1 strand embroidery, you would have to be very patient. Most people use 3-6 strands for finer embroidery.
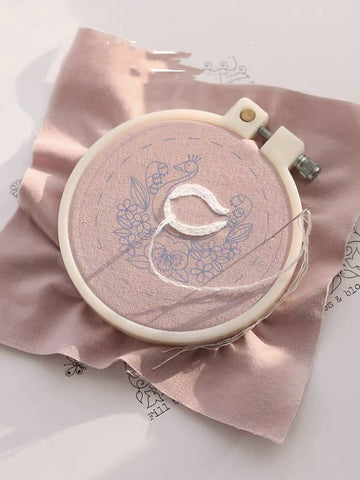
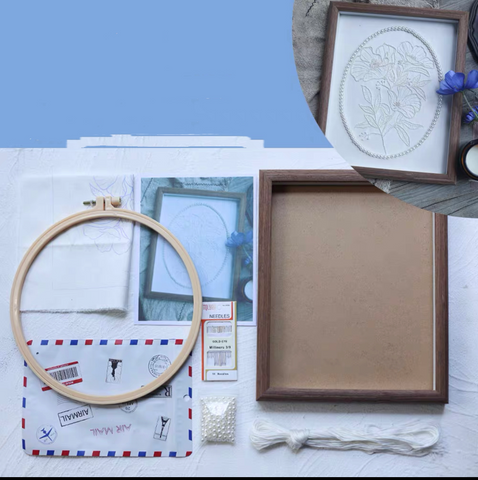
FABRIC - EMBROIDERY TOOL #6
The next step is to choose a suitable fabric to place your design on once all the tools are in place. There is a wide range of fabrics available and it is important to choose the right fabric to suit the type of stitch you plan to use. Cross stitch, for example, requires a canvas-like fabric with evenly spaced holes to sew between.
Only use cheaper craft threads on projects that do not need to be washed. You may also find that cheaper threads are more likely to tangle and knot. I usually use a mixture of cheaper and more expensive embroidery floss to keep costs down. Most of my embroidery does not need to be washed. DMC is well known for high quality embroidery floss.
You would need to be very patient to do 1 strand embroidery. Most people tend to use 3-6 strands. Embroidery floss comes in 6 strands with which you can unwind and pull apart for finer embroidery.
In this section, you will find all the extra bits and pieces you will need when embroidering. Some of these items are free, while others are optional. Try to work with what you already have and slowly add to your embroidery tools kit over time.
ORGANIZATION - EMBROIDERY TOOLS #7
A good container or organizer is essential for organizing all the threads and equipment used in embroidery, especially the multiple threads.
With every addition of color to the enthusiast's stash, the number of threads grows rapidly. It is important to organize them in a proper container. I currently store mine in a zip lock bag, which I cannot recommend, but my house already has so many sewing storage bins. Organize your threads if you intend to embroider regularly.
MEASUREMENT TOOL #8 - EMBROIDERY TOOLS
For embroidery, you don't need as many measuring tools as for other types of sewing. A simple clear plastic ruler can be useful, as can a tape measure, set square, and compass. If you need to draw grids, small quilting rulers can be useful.
Social networking site
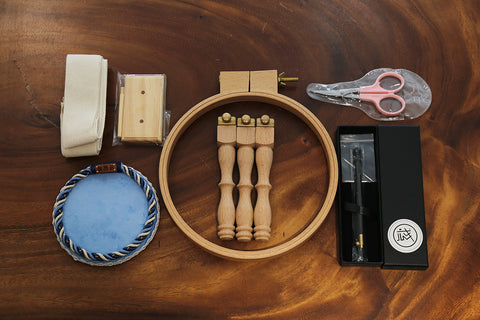
EXTRAS FOR EMBROIDERY TOOLS
You will need all the extra bits and pieces listed under this category when embroidering. Some are free, some are optional, and others you already have in your sewing kit.
A simple clear plastic ruler is useful for embroidery, along with a tape measure and measuring instruments like a set square and compass. If you need to draw grids, smaller quilting rulers can help.
NEEDLE THREADER - EMBROIDERY TOOLS #9
In packs of sharps needles, needle threaders are often included for free, so check your sewing supplies before you buy one.
This needle threader has a silver round head that resembles a coin. If you have never used a needle threader before, you are in for a treat! Check out my article on how to use one.
Use a needle threader to thread a needle
Threader for needles
THIMBLE - EMBROIDERY TOOL #10
Wearing a thimble keeps fingertips safe and prevents blood from getting on the fabric. I find metal thimbles to be difficult to keep on. Plastic and rubber thimbles are more comfortable for longer periods of sewing. While leather thimbles are less common, they will also protect your fingers and mold to shape with repeated use.
What is a thimble?
TRACKING - EMBROIDERY TOOL #11
PINS - EMBROIDERY TOOLS #13
It is important to use stainless steel pins that do not rust, as well as a pin cushion for storing them.
THE SEAM RIPPER - EMBROIDERY TOOLS #14
Seam rippers make unpicking so much easier. When making a mistake, you can simply pull the thread back through the fabric. Removing hand stitches and embroidery is much easier than machine stitching.
TWEEZERS - EMBROIDERY TOOL #15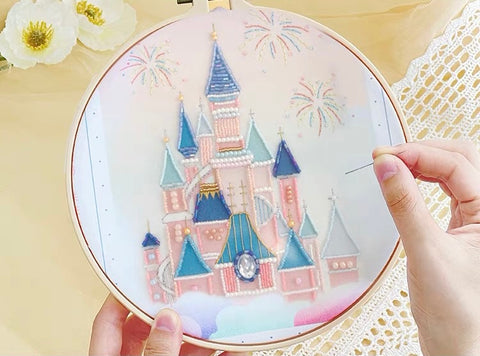
For removing thread remains after unpicking, slanted-edge tweezers are very useful.
PINKING SHEARS - EMBROIDERY TOOLS #16
When making a design, pinking shears help keep the edges from fraying. Keeping the edges neat and trim at the end of the project makes the finishing process easier.
If you don't already have some pinking shears, cut the fabric larger than you need to allow some fraying on the edges. I usually zig-zag or serge the edges to prevent fraying.
BEESWAX - EMBROIDERY TOOLS #17
This is not an essential item, but if you are working on a lengthy project, you might find beeswax to coat your threads less of a problem. Make sure any residue left by the beeswax will not interfere with your design.
EDELWEISS~