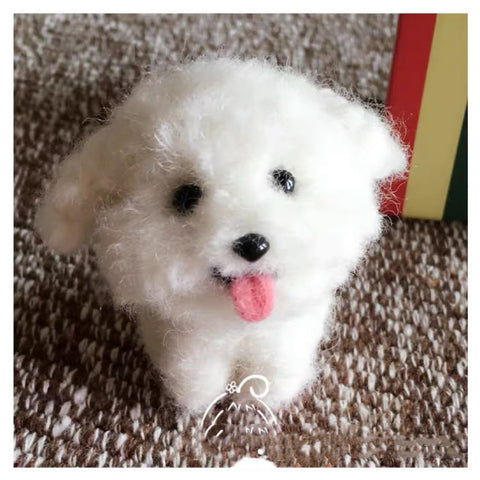
Realistic animals can be shaped, reshaped, and created with incredible attention to detail through the time-consuming process of needle felting, in which you repeatedly stab loose wool fibers with a barbed needle.
You will learn how to make a realistic ermine, also known as a cat snake, in this instructable. on a wire armature using a variety of methods.
Over the course of a month, I worked on this ermine for about 16 hours. Even if you're just starting out with needle felting, you can try it, but you'll need some prior experience because these steps don't cover how to shape your animal. Before beginning this instructable, I encourage you to investigate a few projects for needle felting that are quicker and less complicated.
All the best!
Edelweiss day needle felting
https://edelweissday.com/collections/diydoll
Like me on Ins!
https://www.instagram.com/edelweiss_dayneedlefelt
Step 1: Materials This project calls for the following items: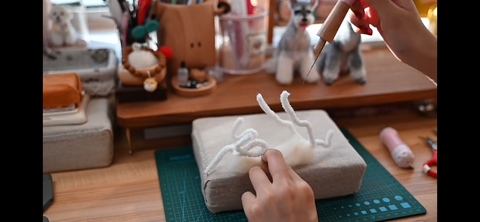
Felting needles in the sizes 36 (optional), 38 (optional), 40 (optional), 42 (optional), and higher if desired; coarse wool roving in any color (white is most common); white, black, brown, pink, and red merino wool (will vary depending on what you want to make); natural horse/alpaca hair or clear fishing line for whiskers; glass eyes with wire loops; pipe cleaners; sharp scissors; super glue; and thread.
Step 2:Make a Wire Armature Once you have your preferred animal, pipe cleaners can be used to make a wire armature in the animal's rough shape. All wires should be folded in because they will pierce your wool and are very sharp.
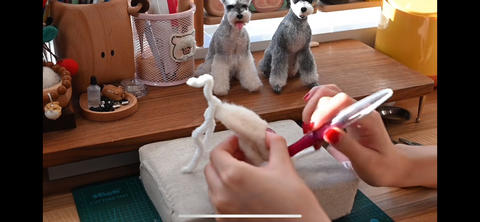
Step 3: Cover the Head and Body with Roving Wool At first, use rough "roving wool" for the body and a coarse felting needle (36 or 38) to feel until you get a rough shape and it sticks together on its own (as shown). Do not do the entire leg; instead, only the top "muscle" should be done because once the layers of soft merino wool are on, it may become too fat.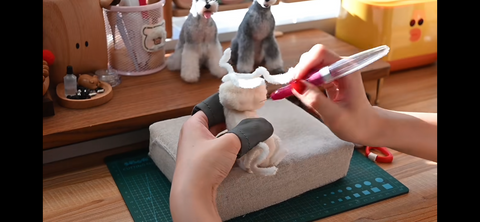
Step 4:Move on to a higher felting needle (40) when this is finished to gradually feel a denser body. Start shaping your animal by layering it correctly and making denser areas where necessary. Your project may become too dense if you switch to a felting needle with a diameter of 42 or higher.
Step 5: Add a layer of merino wool, such as merino sheep's wool, that is fine and supple. Using a very fine 42 felting needle, felt thin layers of wool onto the animal's body. To avoid looking "striped," make sure the wool is in line with where your animal is standing. Felt it evenly and cover as much of the rough roving as you can. Multiple layers will be required for this.
Step 6: The "loose fur" appearance is well worth the time and effort spent creating the tail.
Start by cutting merino wool into sections and making strips. Using a 42 needle, fold the sections in half and felt them onto the coarse roving in the middle. Felted in various directions to the sides until the fur can withstand a light tug.
Continue this process from the bottom up, making sure that each section is close to the previous to avoid patches.
Carry on! Snip the hairs at the end so that they are about equally long.
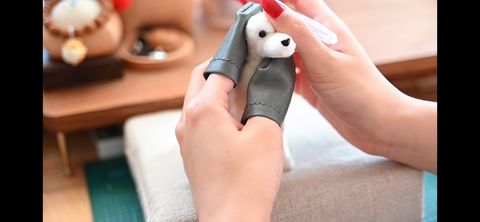
Step 7: Add Ears To make ears, cut a rough shape out of flat felt fabric and use scissors to fray the ends. Wrap them in roving of the appropriate shade, leaving the fray exposed. Using a 42 needle, felt the roving on the ear and then felt the ears onto your animal's head around the fray. Blend it onto the head with merino roving and shape it to fit, making sure the wool flows toward the neck.
Step 8: Shape the Head and Add Eyes Form the head and snout roughly by felting denser areas and adding or removing merino wool. You need to be able to fit the eyes in snugly, so make sure the area around them isn't too dense.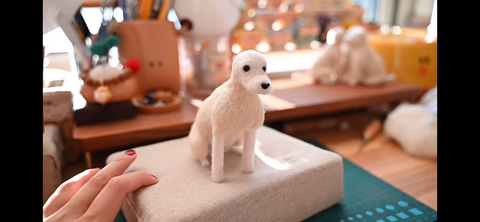
Make use of wire-loop-attached glass eyes. Using exacto knives or scissors, cut slits and indentations in the wool. Pull the needle through the loop until it reaches the back of your animal's head. Then, tie a knot in the back of the thread so that the wire can fit through the slit you made earlier.
Use the merino roving to cover the thread knots at the back of the head after both eyes have been attached. Once the eyes are included, you can begin to precisely shape your animal's head and nose. Use a lot of images from Google!
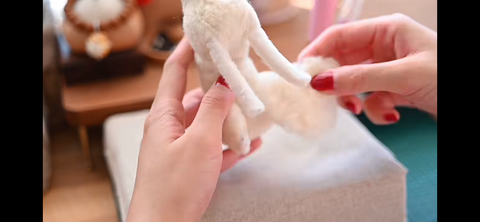
Step 9: Add Paws Cover the bottom of the pipe cleaner with felt and merino roving until it becomes slightly dense. Make several loops with a thread of the same color and pull to make the right number of toe indents. To cover the thread, felt a small amount of merino wool between the toes after completion.
Step 10: Add Details I love this part the most!
Again, using a lot of images from Google, use a 42 felting needle to add your details in the right colors. To improve the shape, darken the area around the eyes, felt a small nose, and use straight lines of roving to make a mouth. Color the paw pads and the inside of the ears. Add any markings that your animal might have, like spots or stripes.
Whiskers can be made with fishing line or natural hair like horse or alpaca hair. Use super glue to secure them in place after putting them through a needle and threading them through the nose. Any kinks in natural hair can be worked out with care using a hair straightener.
Step 11: Final touches: Take one final look at it and, using a 42 needle, felt any stray fibers horizontally to make it look smoother. Using sharp scissors, closely snip the loose fibers.
Beautiful! A piece like this can take anywhere from 15 to 20 hours to complete. Take it easy and have fun with it!
Did you make this project? Share it with us!
someone made this!